Prism
Prism Launcher
Prism is a third-party launcher not related to Microsoft, Mojang, CurseForge, FTB. It can be used to launch vanilla Minecraft, custom Modpacks, FTB, and CurseForge Modpacks. This launcher is great for getting into modded Minecraft and providing a simple experience but also caters to power users. Prism run on Windows, Linux, and macOS.
How to Install
Head to Prism Launcher and download the Prism Launcher for your OS. The steps below are taken from a Windows install so it might be different if you’re on macOS or Linux.
Once you’ve downloaded the launcher go to your downloads folder and open the installer and follow the instructions below to get set up.
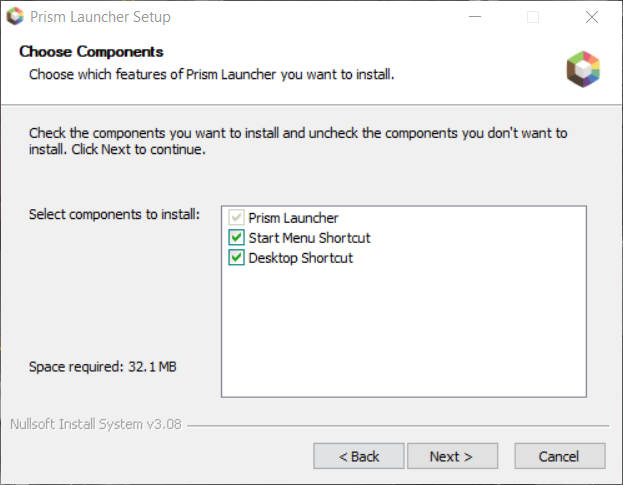
- In the launcher’s base install screen click next till you see an option to create a desktop shortcut. We highly recommend creating one. You can do so by clicking the checkbox as shown below and then clicking next.
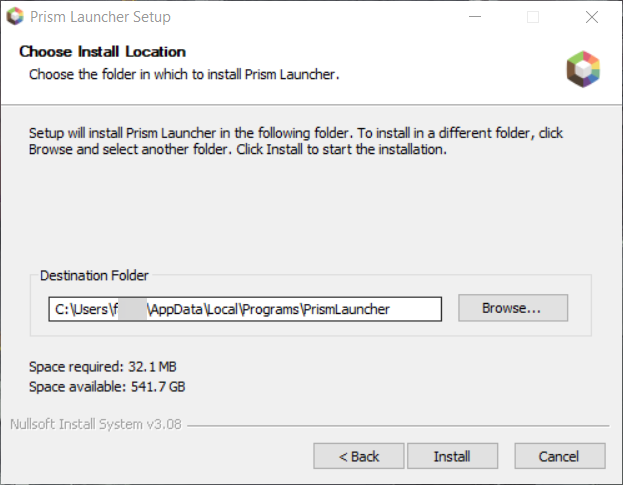
- You can choose where to install the application, however, installing in a non-default location tends to cause problems. We recommend just hitting install.
- Once this completes you can launch Prism by either searching for it on your computer or launching it from your Desktop.
Basic Setup
To be able to use Prism you will need to do some basic setup and to do so you can follow the steps below. Please note that if you don’t have an appropriate version of Java installed you will need to download it.
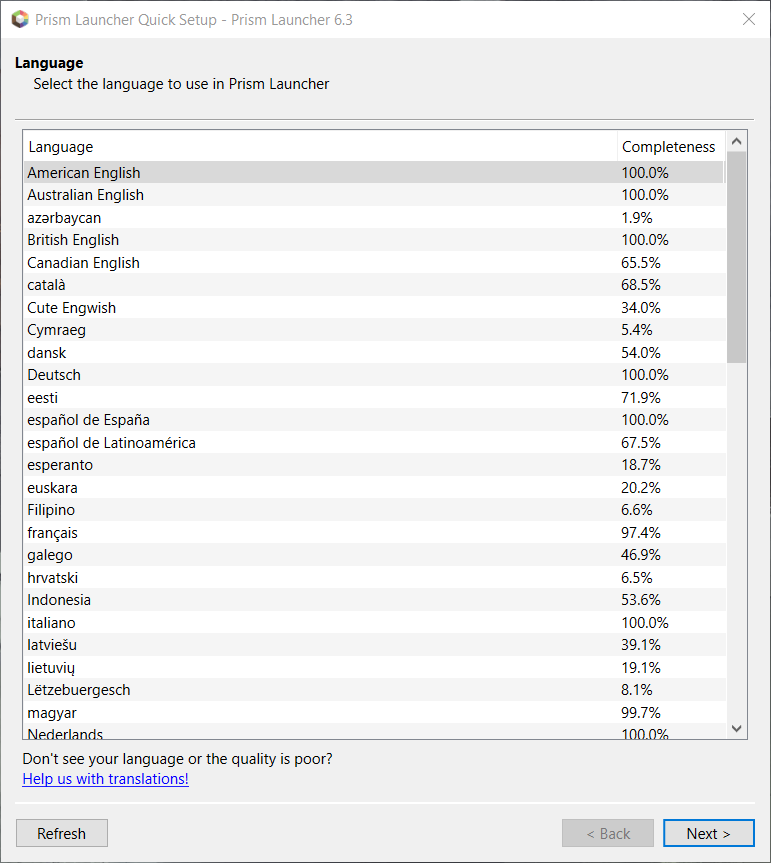
- Once you launch Prism for the first time you’ll see a screen like this. Click the language you speak and wish to have your launcher in. In this case we’ll be using American English. Click next once you’ve done so.
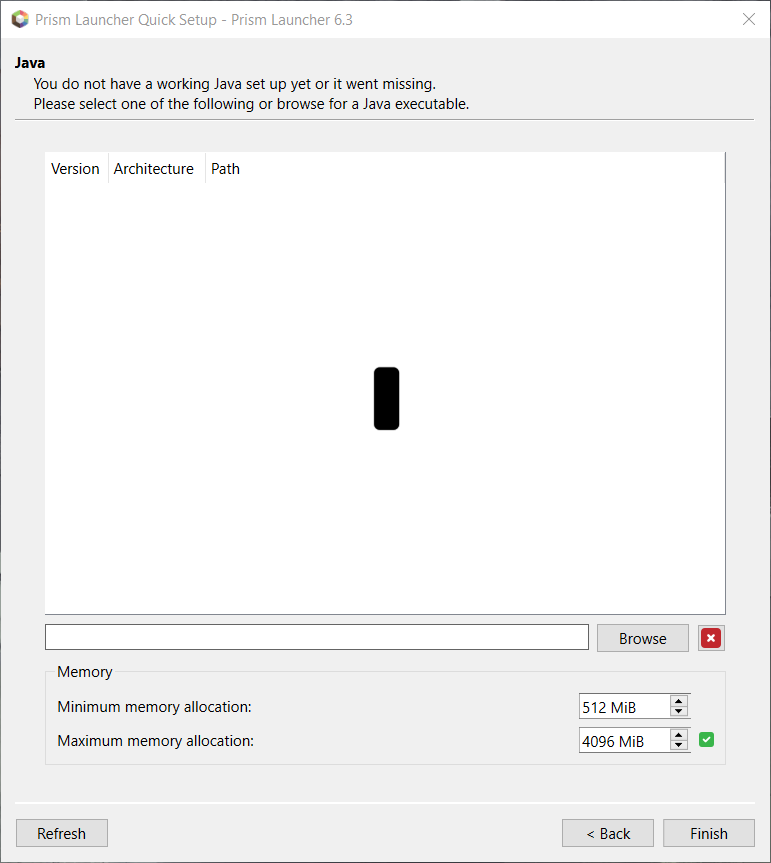
- On this step if you don’t have Java installed, you will need to pause and install Java first, otherwise please proceed by selecting the correct Java version from the list here. Note that in the the screenshot below Java isn’t installed and you will need to install it if you see this and then click refresh. After you have Java selected and are happy with your choices, click “Next”.
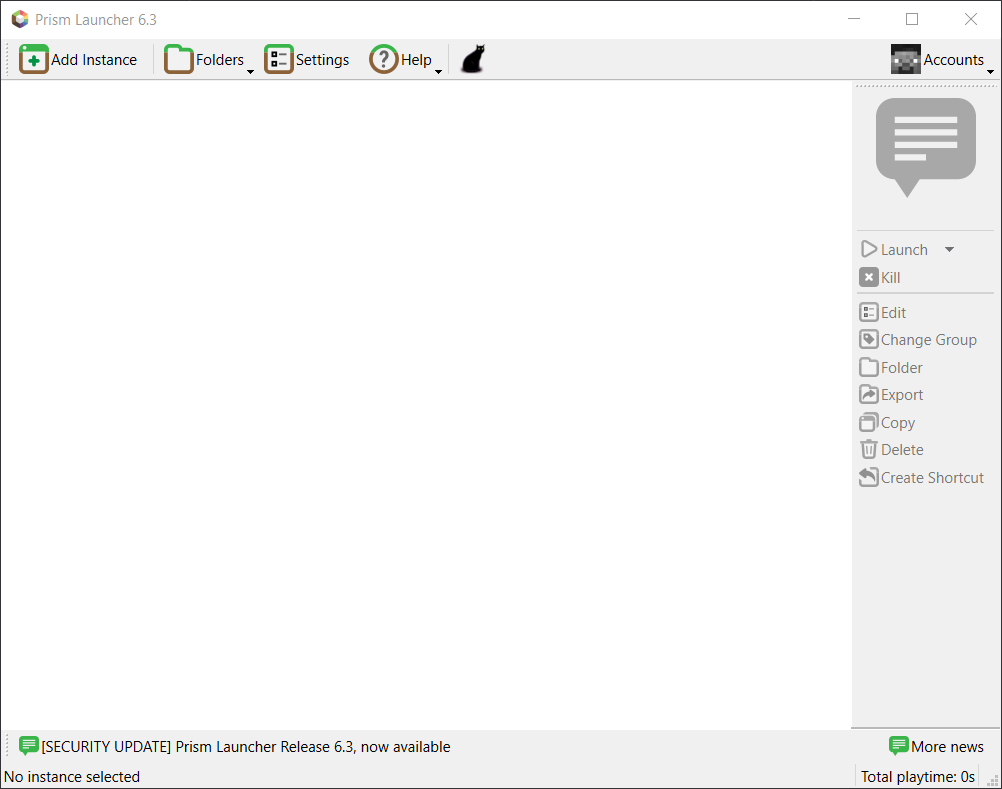
- In the top right corner you’ll see a dropdown labeled “Accounts”, click that and then “Manage Accounts”.
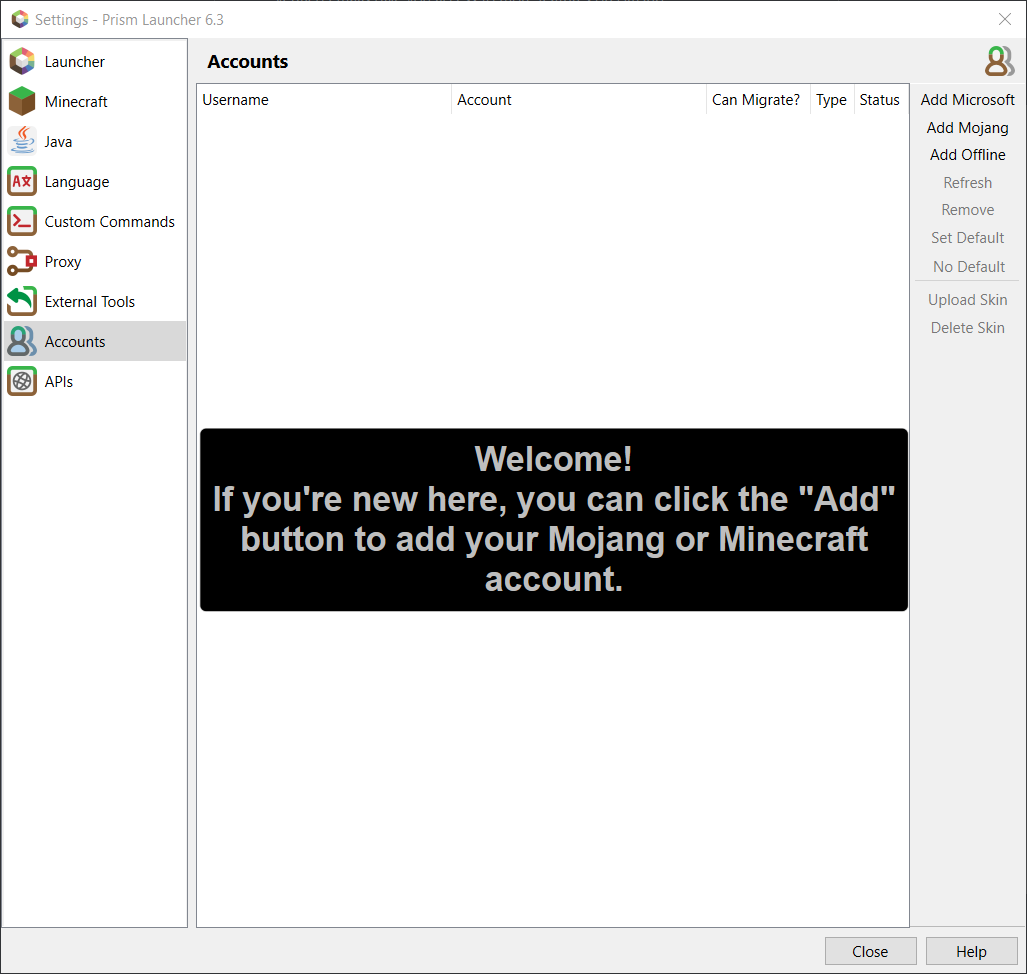
- On this screen you’ll see a button in the top right that’s labeled “Add Microsoft” click that and it’ll prompt you to login to your Microsoft account on the web. This will launch a web browser.
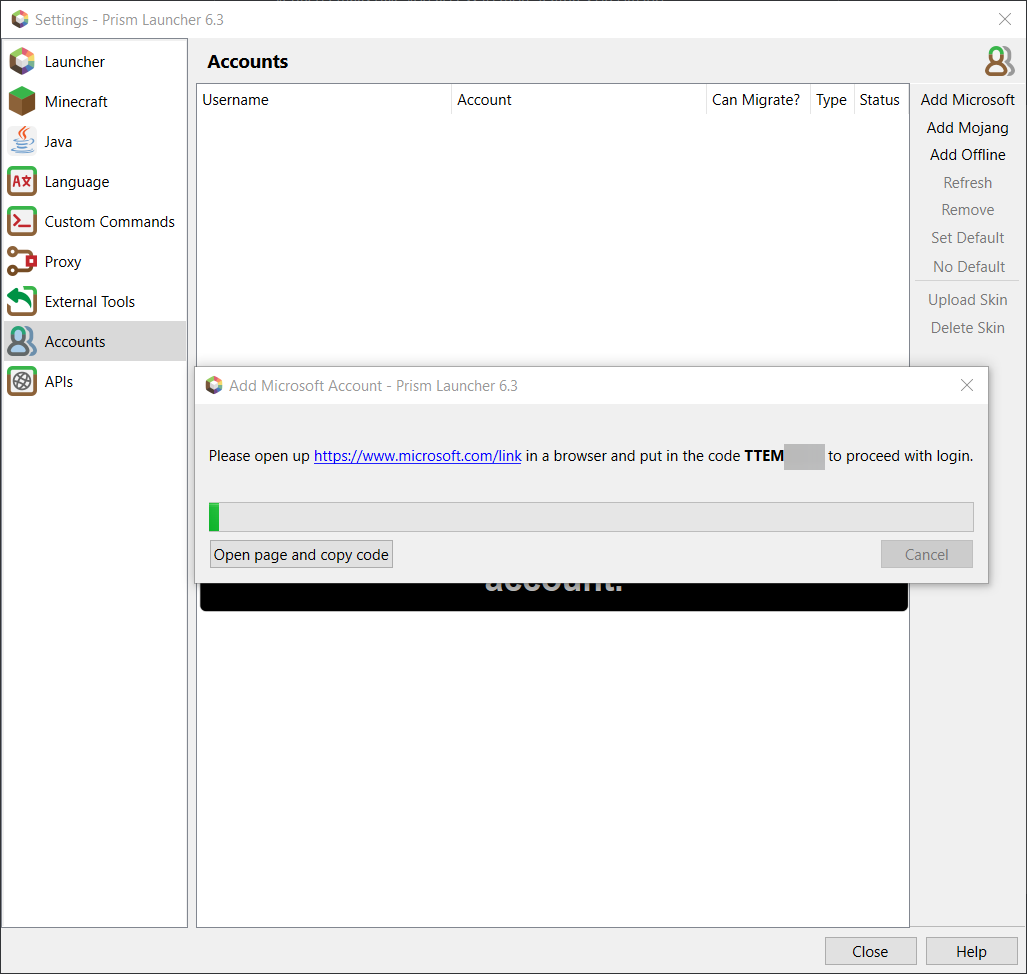
- At this step click the “Open page and copy code” button. I highly recommend that you manually copy the code shown as well to ensure that you correctly paste it. Login to your Microsoft account and then paste the code. It will inform you that you can close the window when done.
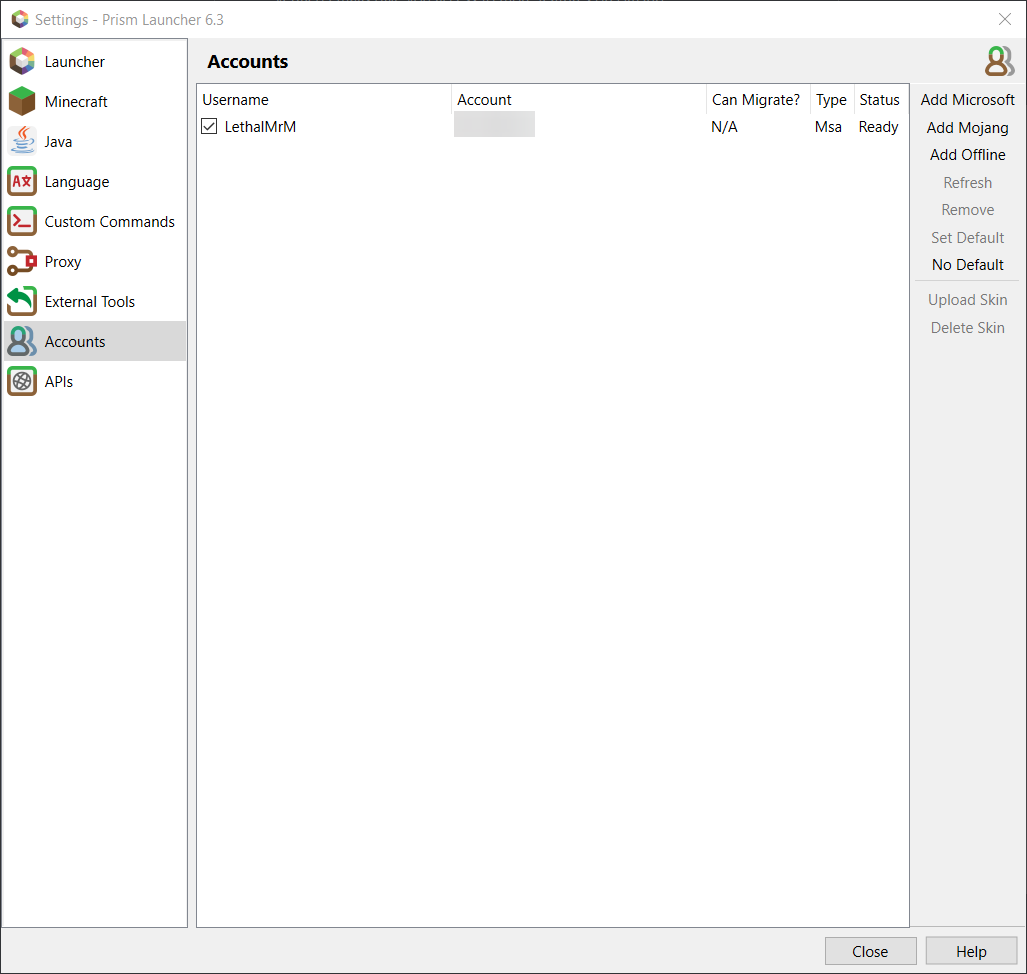
- If you’ve done everything right you should see something like this. Click the close button and then proceed to the next section to add a mod pack.
Adding Mod Packs
To be able to play Minecraft with Prism you still need to add a mod pack to the launcher and use it. You will need to know the pack you’re looking to use as well as it’s version. You can find the version and our packs in the #info-server-ips channel on our Discord
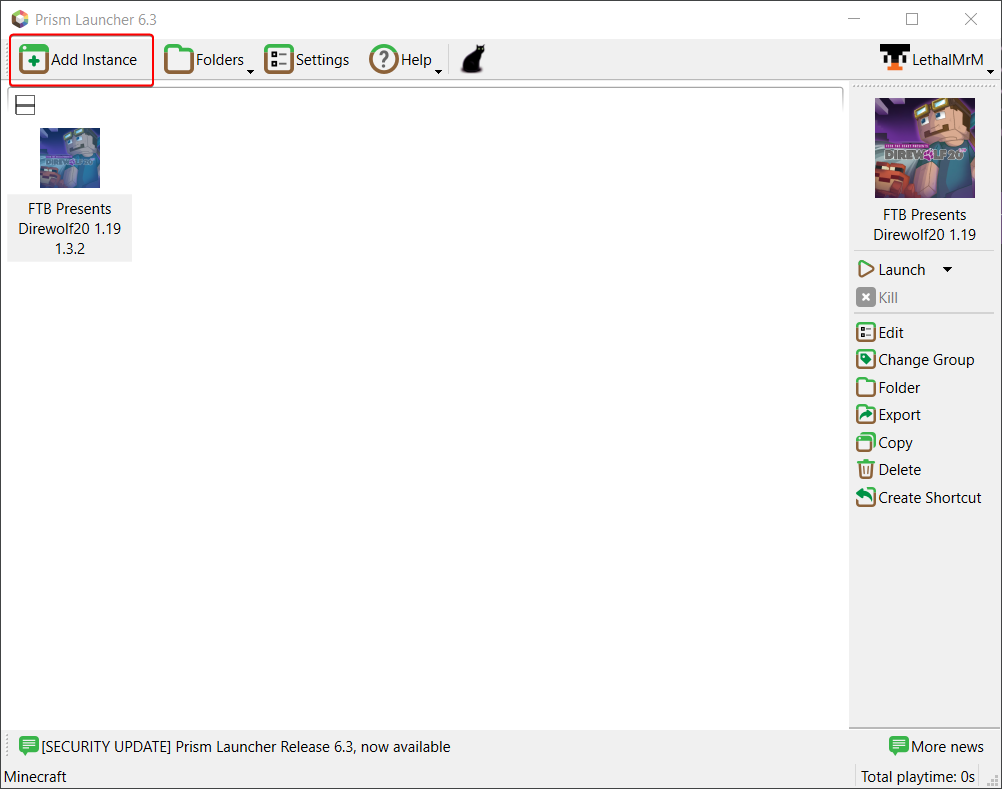
Once you’ve gotten both the pack and version number you’ll need to add them using the launcher. In this example, we’ll be adding Direwolf20 1.19 from FTB. This assumes you’re already in the main launcher window of the Prism application.
- Click Add Instance at the top of the Main Window
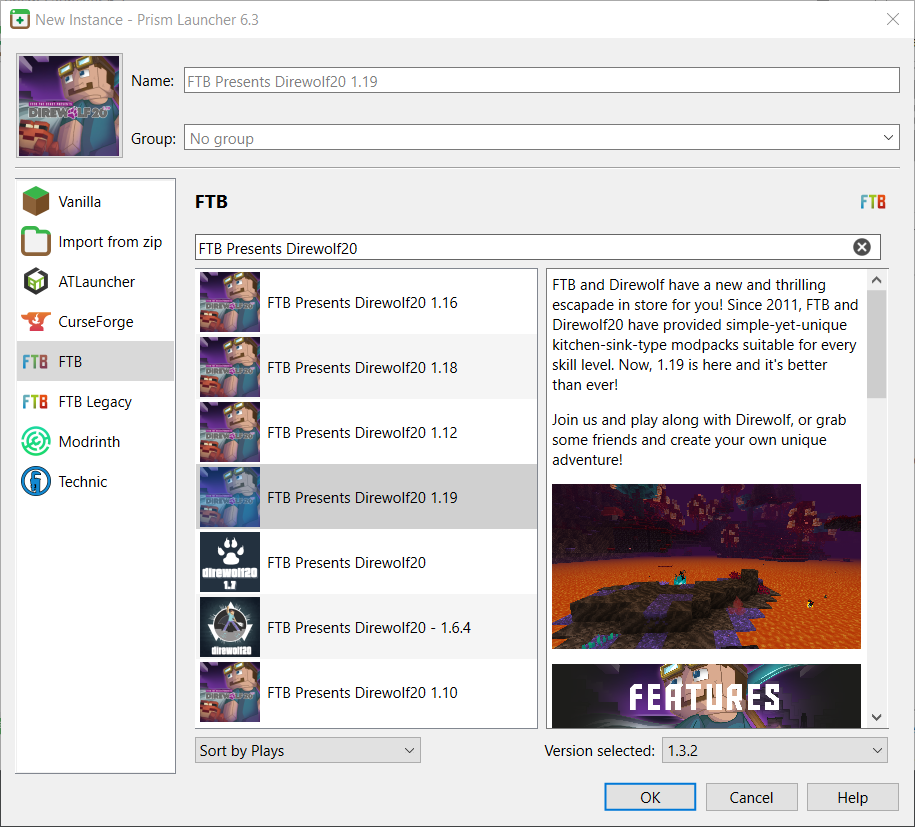
- Once you do so, you’ll have a new window popup and it’ll show different Minecraft versions you can install. Choose CurseForge for any CurseForge packs and FTB For any FTB Packs. In the below example, we’re installing DW20 1.19.
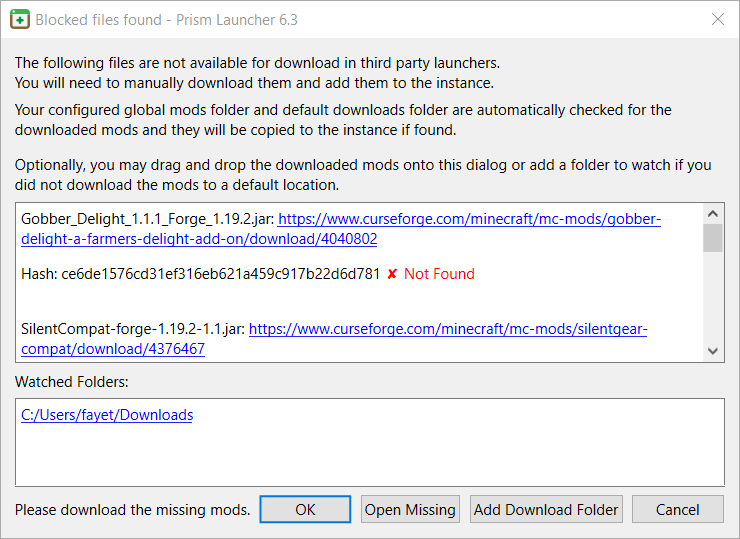
- Once you select your pack and click OK to install it you will likely get prompted to install more mods that have to be downloaded by a browser, luckily, Prism can automatically manage this for you. Click the “Open Missing” button and then let it open all the mods and download them. Once that’s done and all mods are downloaded, click “Ok” to continue with the installation.
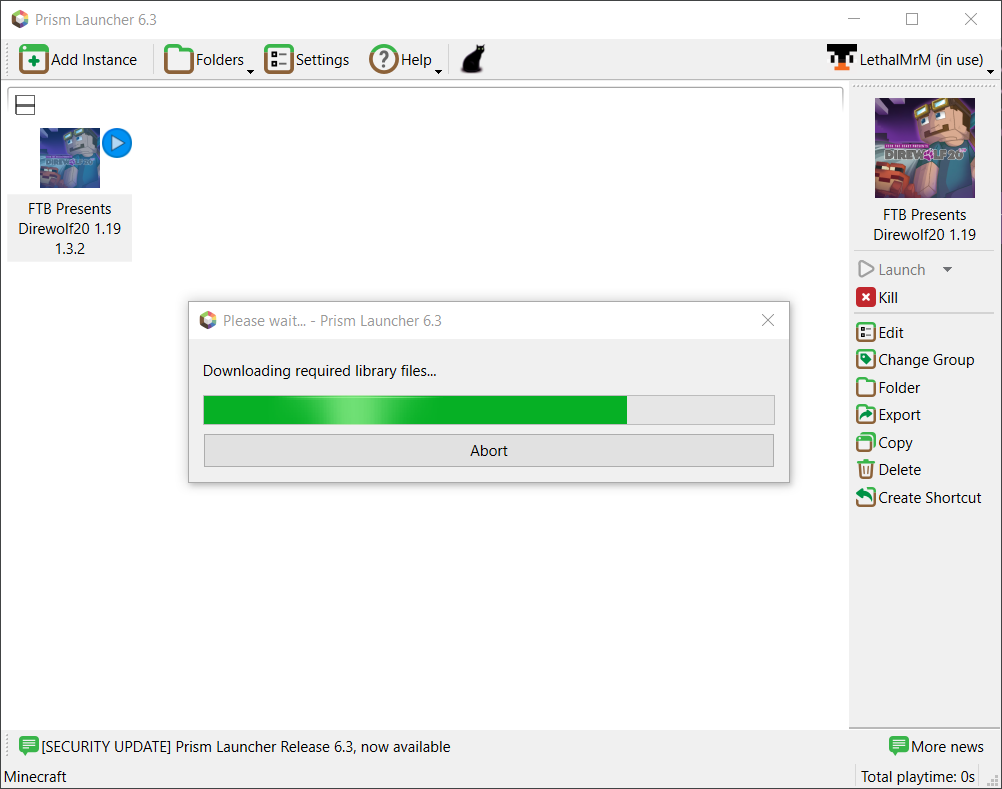
- When the modpack has finished downloading you’ll see a screen similar to this. Wait till the progress bar completes and you get access to the main window again Double-click the game’s icon and your game should launch. If it doesn’t you might need to edit your Java version for the pack. You can find the correct version of Java here.
Updating Modpacks
Prism doesn’t have a pack update mechanism at this time. To update simply follow the steps above to add a new Modpack and create a new instance with the updated pack version. You should likely label you packs with the version number to avoid confusion.
Updating Per-Instance Settings
In the example below we’ll be updating the memory for a pack instance, however, you can also update your Java Version as well as add Java Arguments to make the pack run more efficiently.
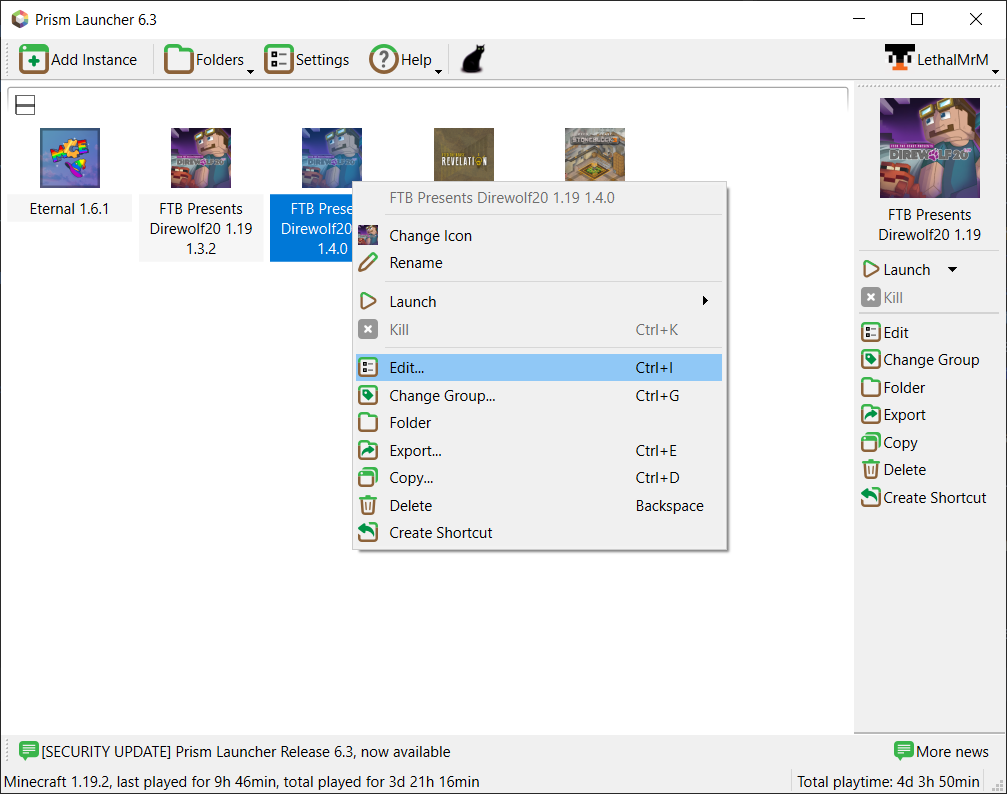
- By default, Prism will use the amount of memory that you set as a default. You will want to right-click on an instance and select “Edit” on the popup menu to be able to change this value.
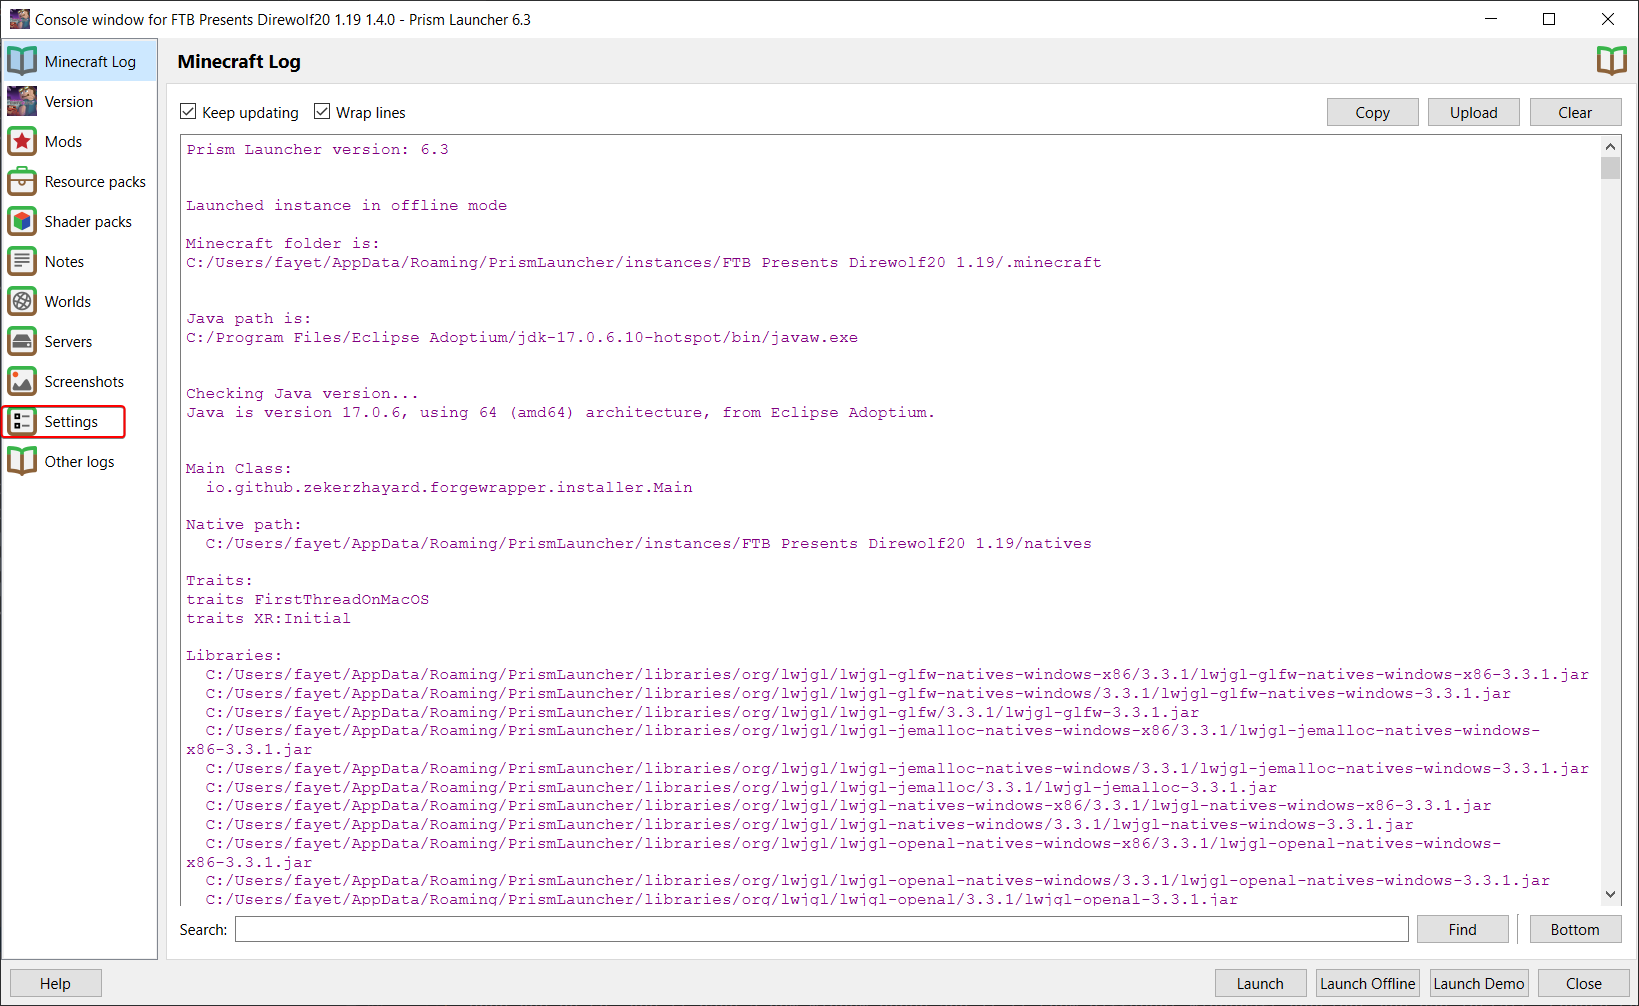
- Click settings on the new window that opens. By default, it will show a log of the Minecraft instance from every time you have started it.
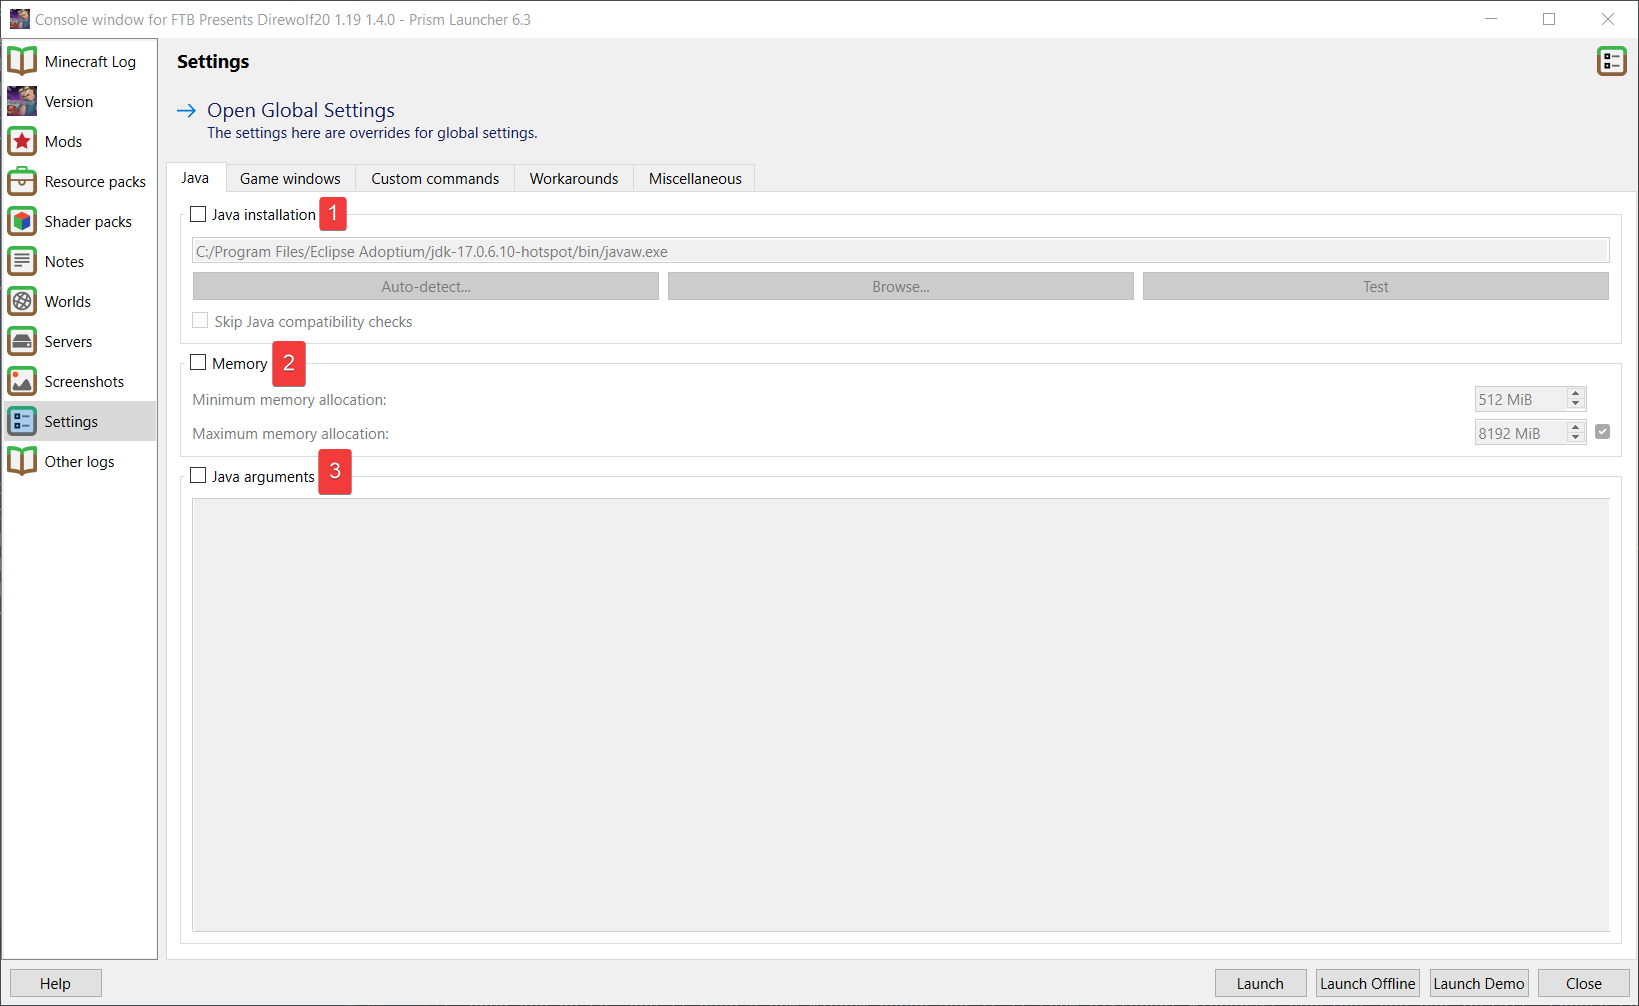
- The new screen that is shown is broken down into three parts.
- Change from the default Java version. You can find the correct version of Java to use per Minecraft version here.
- Memory settings
- Java Arguments. You typically don’t need to adjust this, however, you might want to check our Modpack tips section to see if there are any suggested arguments for your pack.
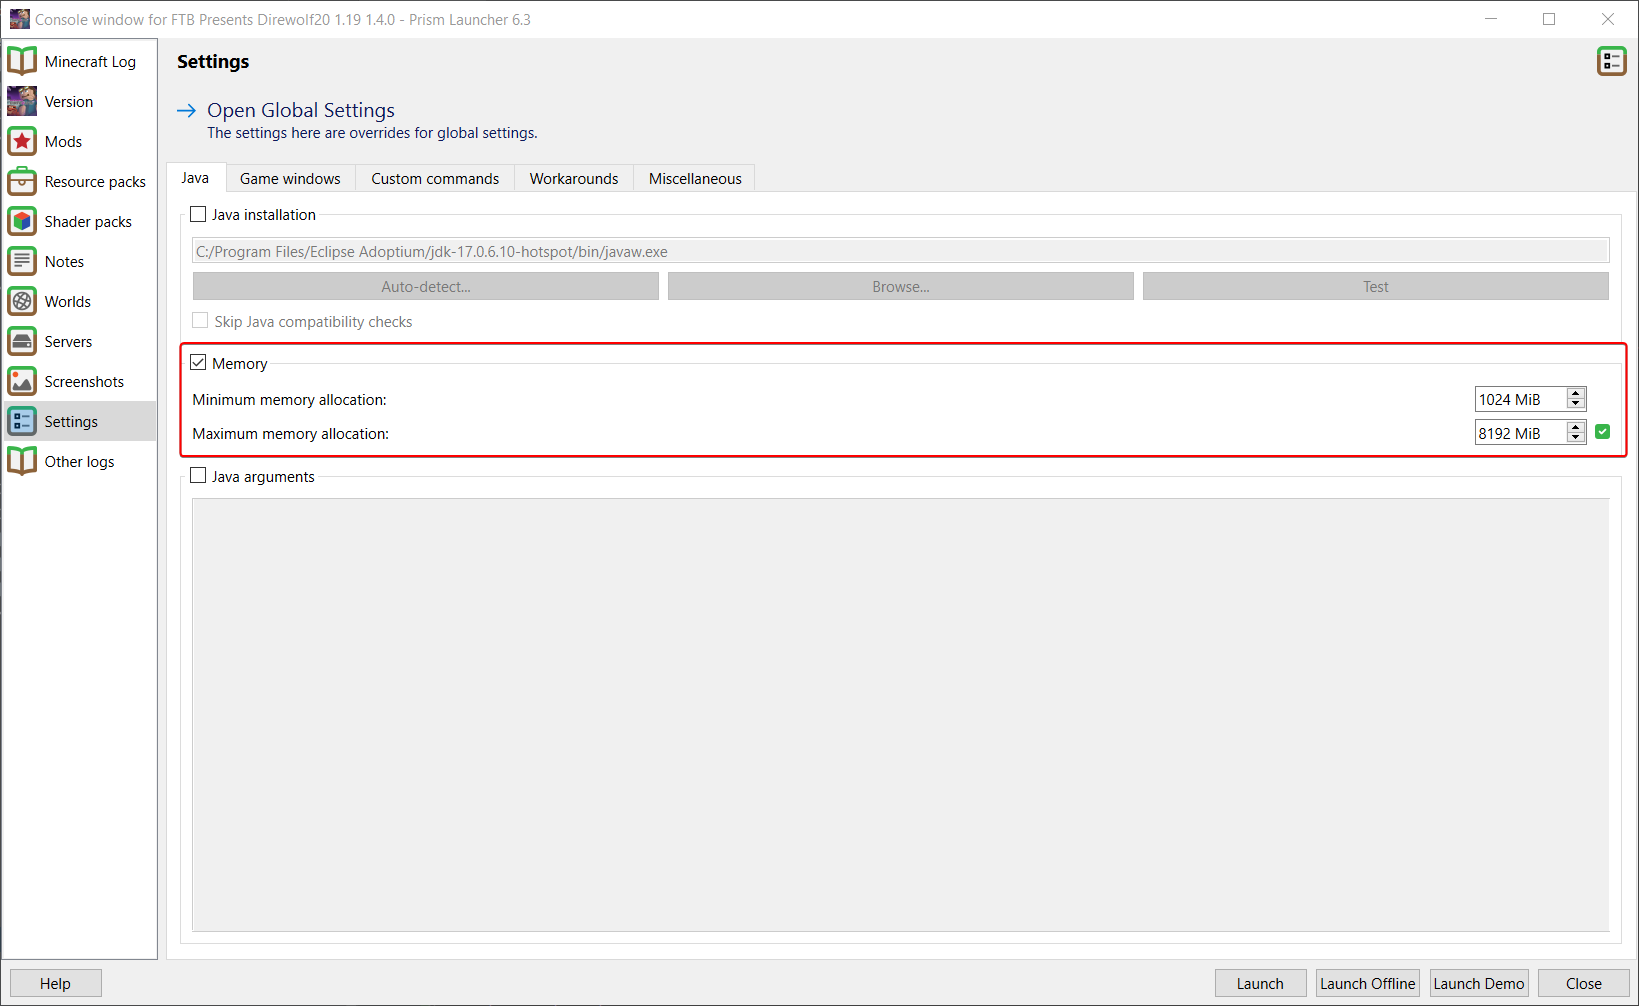
- To edit the memory that you want to set aside for Minecraft/Java you need to click the checkbox next to the word “Memory” in section 2. When you do so you will see the following and be able to adjust it. Suggested values are below while leaving an extra 2-4GB for your system and other applications.
- To allocate 6GB - 6144MB
- To allocate 8GB - 8192MB
- To allocate 10GB - 10240MB
- Once you are done with any changes you’d like to make here click “Close” at the bottom of the window and you’ll have them saved you can then launch your pack by double-clicking as usual.